Create & Manage Surveys
Survey Creation
NgSurvey nicely integrate with the WordPress custom post types to laverage the well-tested and most useful WordPress features. The first building block of a survey creation is to create a title and add some content to it. Let’s get started.
Create a Survey
NgSurvey, once installed, adds a new left navigation menu item to your administrator dashboard. Access your surveys list by clicking on the NgSurvey -> All Surveys link. This looks much familiar with your WordPress posts or pages screens.
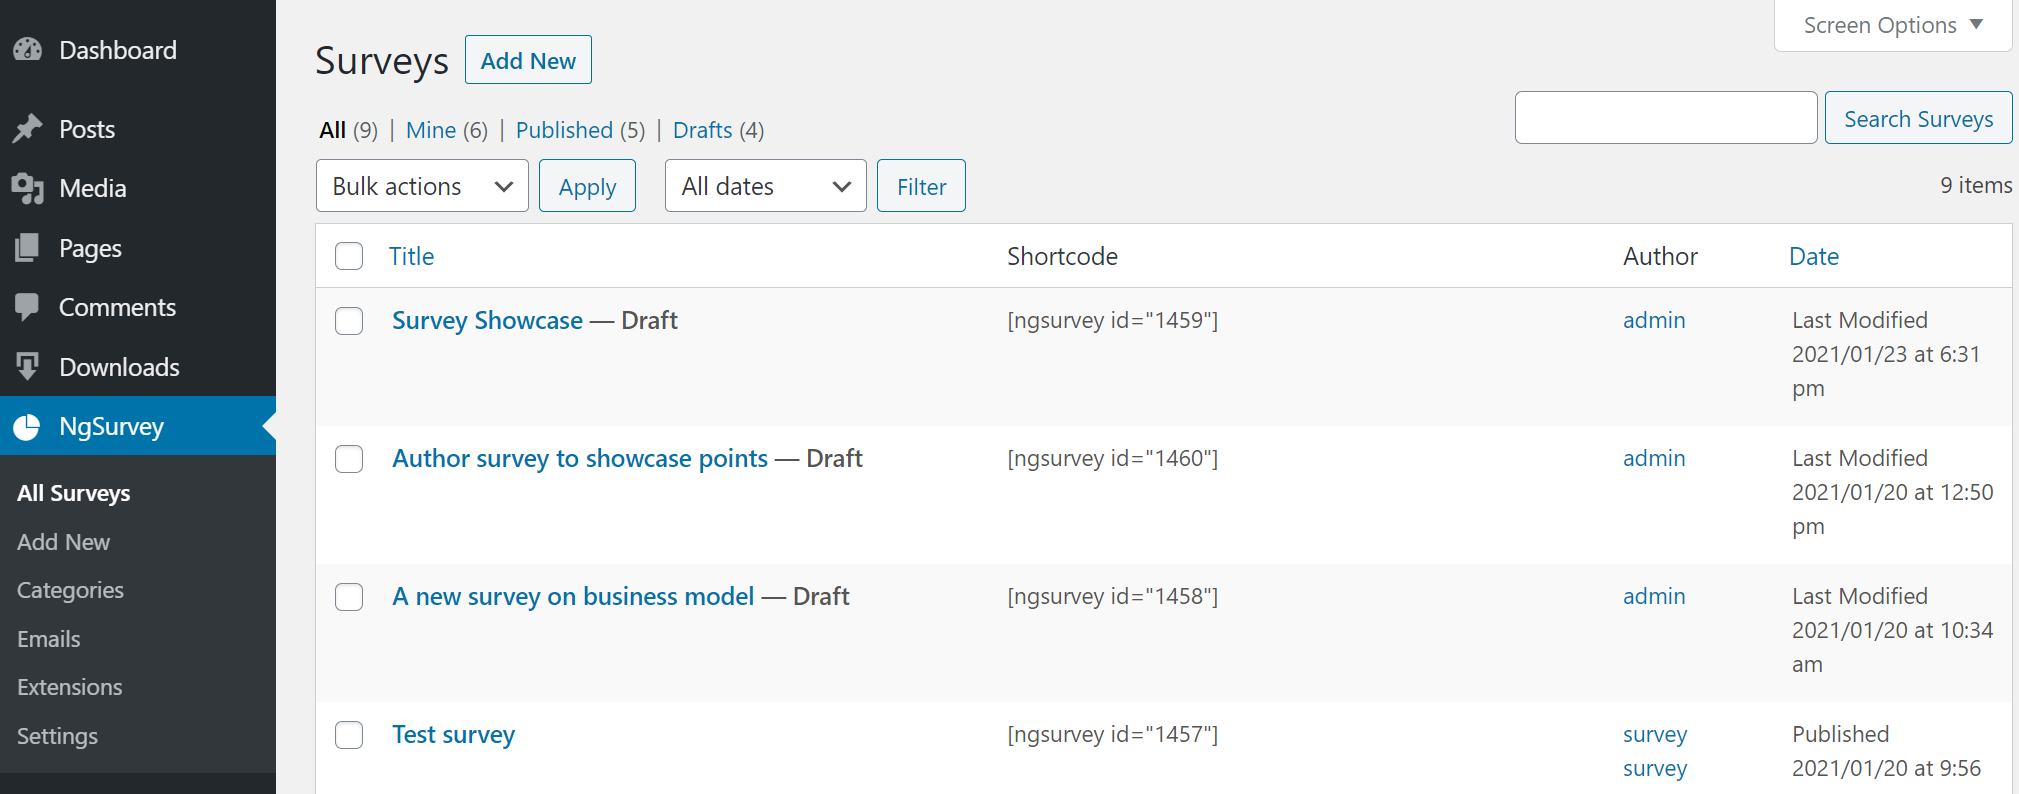
On this page, you can see existing surveys, filter them by their status, publish them or delete them. Start creating a survey by clicking on the Add New button.
This will take you to the survey content editor. This page is again much similar to your posts/page creation page. You can create full page content of the survey introduction just like how you create a blog post or a page using Gutenberg editor.
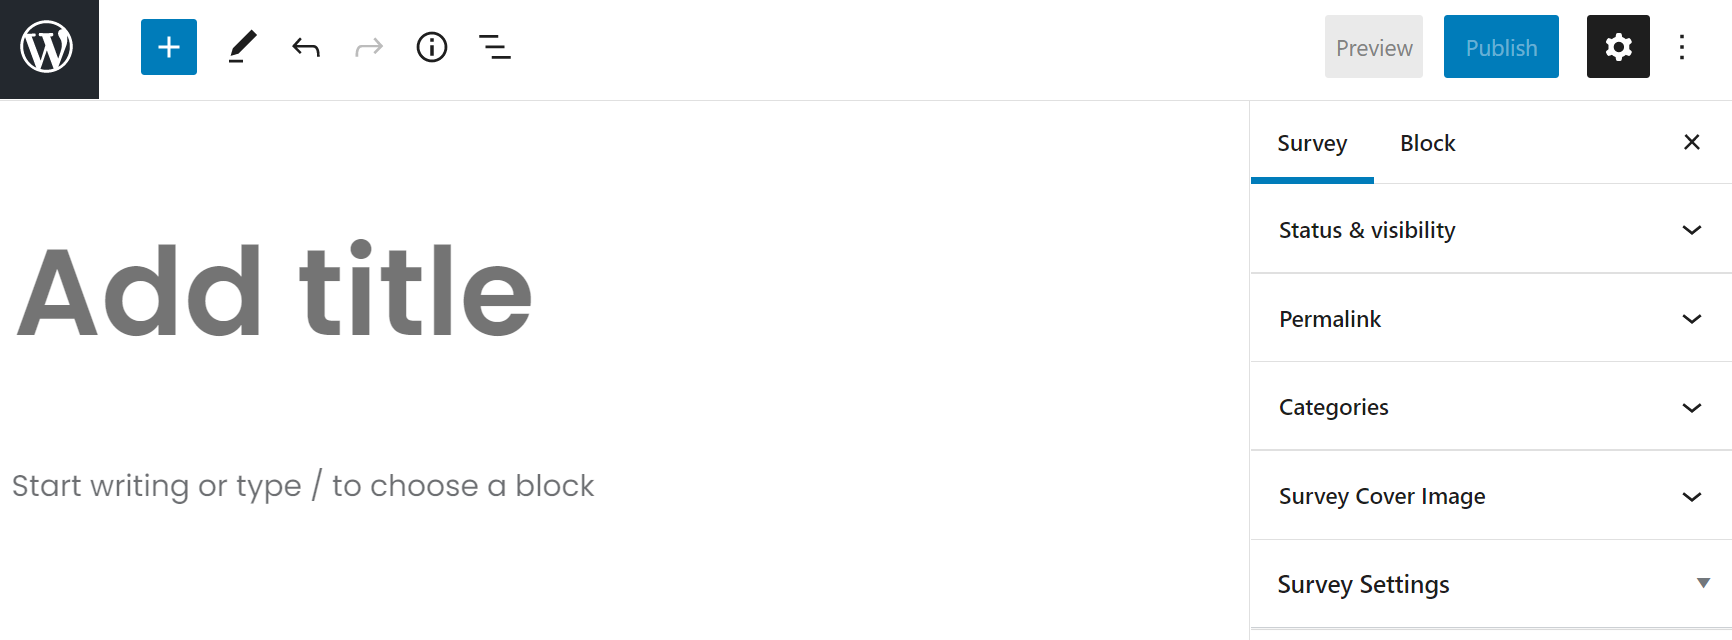
Start adding a title and some content for your survey. The content is optional and can be displayed as an introductory description when you are publishing the survey as a menu item or post. You can use all Gutenberg blocks available on your site to describe your survey.
Once you have entered the survey title and description, save the survey by clicking on Save as Draft link shown. We don’t want to publish the survey yet as we have not yet added our questionnaire and other content.
Survey Settings
This is the page where you can find fre customization options for your survey. Expand Survey Settings tab on the right sidebar. The following options can be customized which will apply to your survey.
Survey Type: This option allow you to choose how you would like to present your survey to the users. There are two types of surveys possible. Public Survey and Private Survey.
A public survey is accessible to all users (provided the proper permissions to access content is given). They don’t need any special URL and can be accessed from menu items, short-codes embedded in your posts or pages etc. The public surveys can be accessed using regular survey URL or the unique survey URL.
Whereas a private survey is more protected survey type and cannot be accessed directly by the users unless they know the unique survey URL. This survey type is most useful when you want to run a survey in a controlled manner and allow only the people that you know or you would like to invite certain group of users. Irrespective of type, every survey response will have a survey key. However for private surveys, the key is mandatory to take the survey. The key is part of the unique survey URL that you can generate and send it to your users.
Tracking Method: This option is used to restrict the multiple responses if your survey is public survey. There are 3 ways that you can protect your survey from duplicate/multiple responses namely cookies, ip address and username.
As the name suggests, the cookies option will store the cookies on user computer to identify what all responses the user already took. Since the cookies are stored on user browser, they can be deleted by the user by clearing browser cache. This method is useful when you need moderate restriction and you trust your users.
The IP Address restriction allow you to restrict multiple responses from a single computer IP Address. The user IP Address is stored in your WordPress database in the responses table. They can be validated against any future responses. However, if the users are behind a proxy, only proxy IP can be captured. That means all users behind the proxy can answer the survey only once.
The username restriction is the most effective and efficient mechanism to restrict multiple responses. This method is useful if the survey respondents are already registered on your website. The userid is validated against every response. Since the userid cannot be duplicated, you can accurately control the multiple responses.
End Message Title: Every survey has a defined outcome – to show a thank you/final message or to redirect to a different page on your site/other site. The final thank you message can have two parts – title and description. This option can be used to customize the title of the final message.
End Message Description: This is a textarea field where you can add custom text/HTML content to display at the end of the survey. This is mostly used for displaying a thank you message.
With that we are finished creating the survey content and setup. Now our next goal is to add the questionnaire. Let’s get started.
Form Builder
With the built-in form builder, you can easily create and manage your questionnaire. The form builder is ajax enabled, that means you need not move out of the page or refresh the page to create each question and its quicker.
Accessing Questionnaire Form Page
Once you saved your survey in the Survey Content Editor, you need to close the form page and come back to the surveys listing page. The questionnaire form is on its own page and cannot be accessed from the same page as the survey content editor. When you hover mouse on your survey in the listing page, you can see additional links.
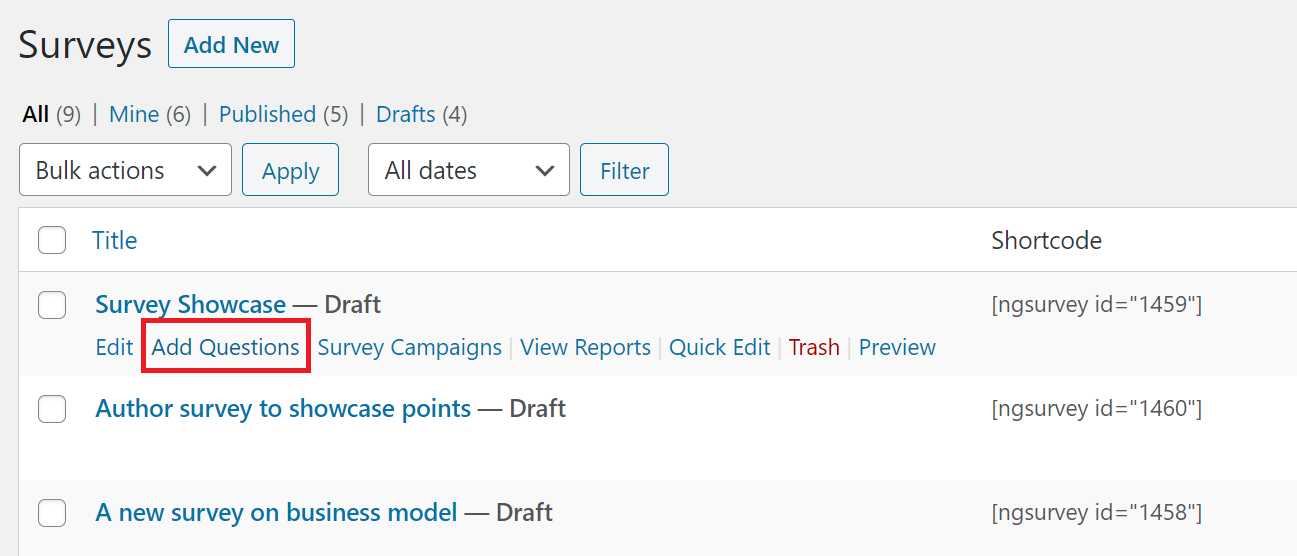
As you see in above screenshot, you can access the questionnaire form builder and reports pages using the links provided below each survey when you hover on the survey item row in the listing table.
Click on the Add Questions link as shown in above screenshot. This will open a new screen to add your questionnaire, pages and conditional rules. The unified interface of the form builder allow you to create and manage questions without leaving the page. Please note that we have not published the survey yet, so it will show as a draft.
Adding Pages & Questions
The questionnaire form builder page has few important elements as shown in below screenshot –
- The question types list where you can click on the desired question type to add the question
- The navigation menu on top to switch between questions list, pages list and conditional rules list (no page refresh)
- The questionnaire elements such as page switch dropdown to switch to different page questions & already added questions list
The first page is already created for you when you open the page for the first time. You can add more pages using the buttons shown or from the pages tab. Start adding questions by clicking on the desired question type from the left side question types menu.
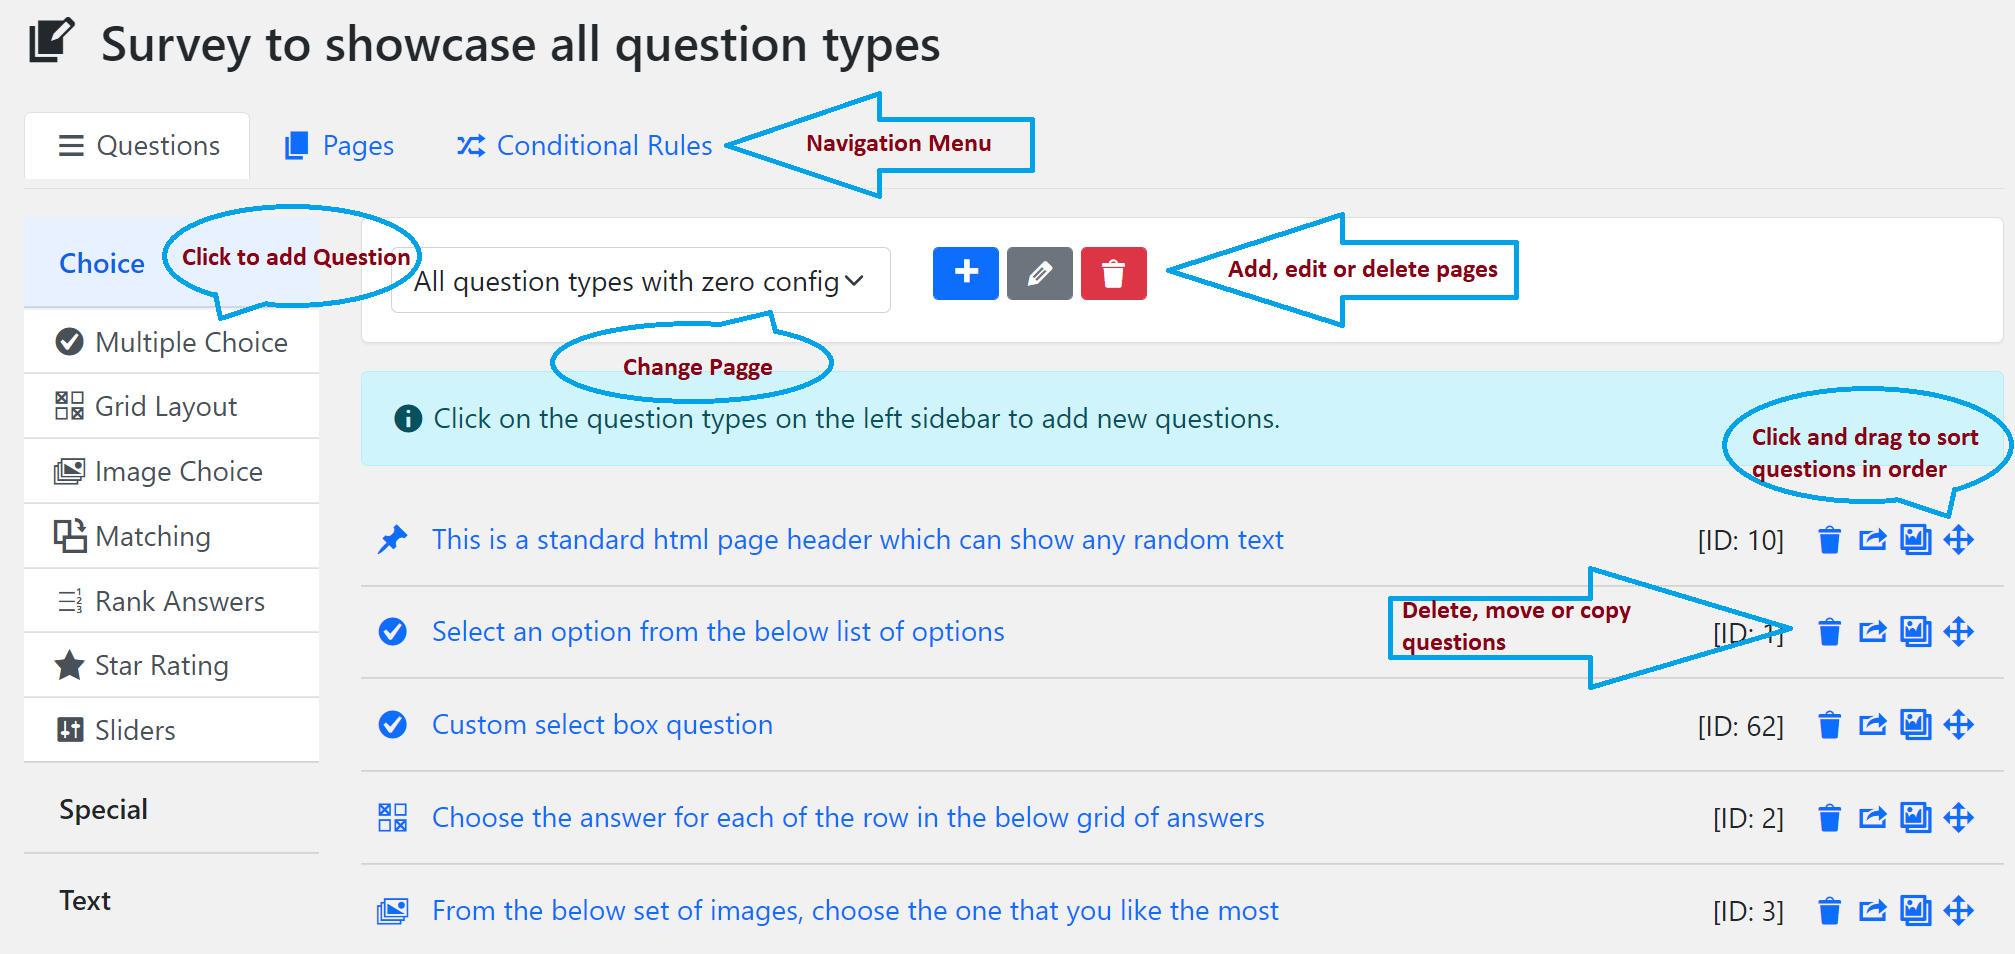
As shown in above screenshot, once the questions are added, they will be shown on the main question form area. You can click on the question title to expand it and add details such as question description, answers, if any, and the customization options.
It is always good practive to have not too many questions on a single page, instead you can add multiple pages as per relevance of the questions and add the questions in them. If you would like to move a question from one page to another, use the move button of the question. To arrange the questions display order, click and drag the question using drag handler (last button shown in above screenshot). To duplicate a question, use the copy button and to delete it, use delete button.
Every question is given and ID which is shown in the question header ( e.g. [ID: 62] ). This is useful in debugging the issues.
The question types are grouped into 3 groups – Choice, Special and Text. You can click and expand the group to see the question types available in that group. If you don’t see a question type, make sure that the corresponding question type plugin is enabled.
Managing Pages
The pages tab on the form builder shows list of pages that you have created and allow you to add new or arrange the existing pages in the desired order.
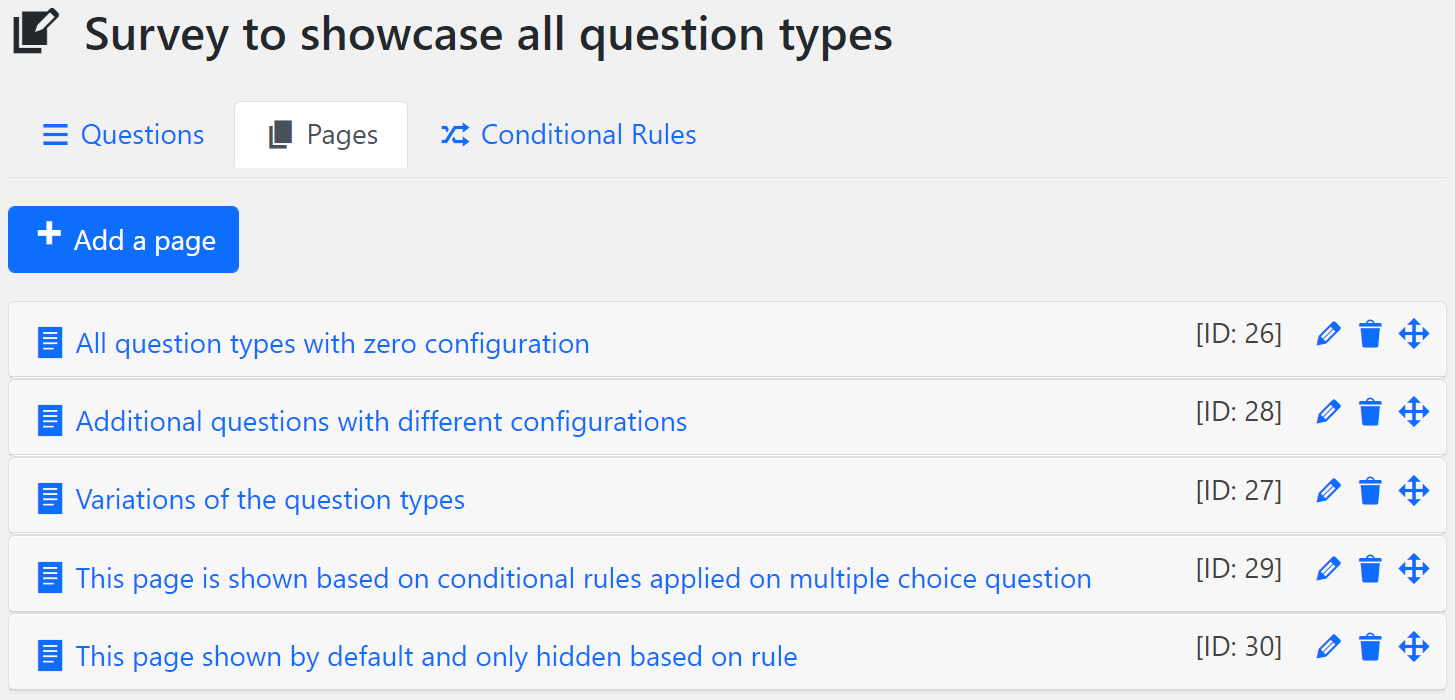
Every page has a title which can be used to identify the page. In the pages tab, you can customize the page titles by clicking on the edit icon. If you want to delete a page, click on the delete button and confirm the popup dialog. The drag handler can be used to drag and drop the page to arrange in a sorted order. When the user is taking the survey, the pages are shown in the same order as you see in this tab.
Managing Conditional Rules
Not every person is same and so is the survey. You can target different groups of people with different set of questions/pages using the conditional rules. For example, if a user likes the football game, you can ask the questions relevant to the football game. In the same survey, some other user answers baseball as his/her favorite game, you can target the questions related to baseball. All these are possible by adding conditional rules.
Conditional rules have two important aspects.
- Rule conditions
- Rule actions
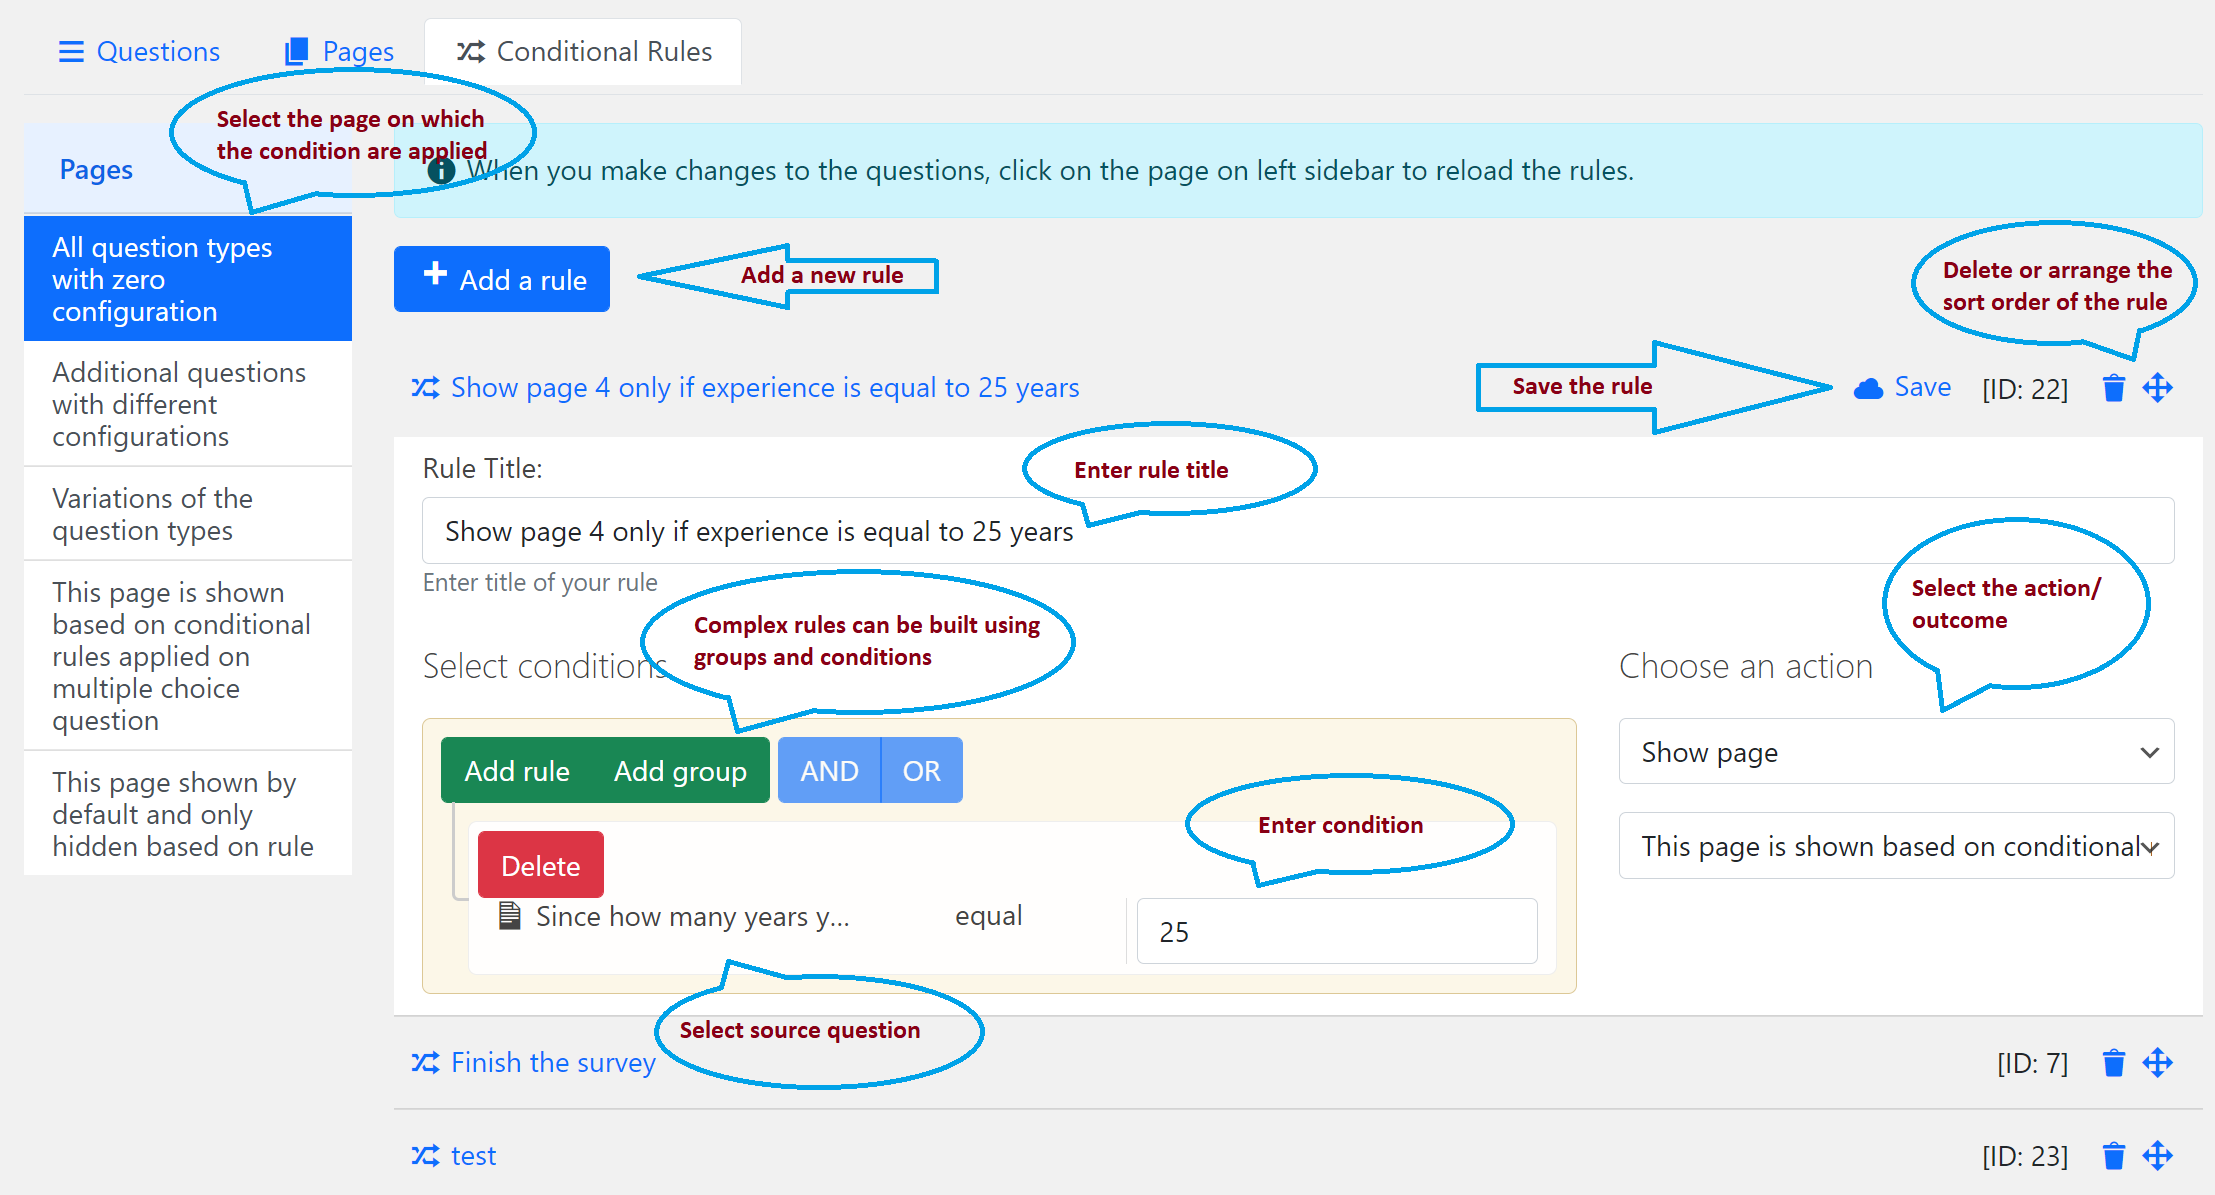
Rule conditions are the set of conditions that needs to be satisfied in order to consider the rule as a valid rule. Rule actions/outcomes are the action that would be taken when the rule conditions met. Take for example the same favorite sport question.
What is your favorite question?
- Football
- Baseball
- Tennis
- Cricket
Now the first condition that we create is based on the answer selections. If the user select Football, then show page number 4. Given this rule in place, when the user select the Football as answer to the above question, the first rule condition is met and the configured action will be applied, in this case shows the page number 4 when clicking on the next button.
There are 7 different actions that are possible for every rule condition as shown below.
- Show a page – if rule is not met, the page will not be shown
- Skip page – skip all pages before the given page and shows the given page directly
- Show a question on the current page – the target question will be toggled as and when the user selections on the source question changes
- Hide a question on the current page – Same as 3, but when rule is met the target question will be hidden
- Show a question on the future page – this will show the question on the subsequent pages if the given conditions are met
- Hide a question on the future page – hides the given question on the subsequent pages if the conditions are met
- Finish the survey – skips all future pages and finalizes the survey when the conditons are met
Combine with the rule conditions and the rule actions, you can build as many conditional rules as you want. Please note that the rules are scanned in the order and first rule which meets the conditions is considered for taking the action.
The conditional rules are applied on the questions available in the selected page. Switch between the pages by clicking on the pages list on the left sidebar and add all conditional rules as per your requirements.
With that creation of the survey questionnaire is completed. It’s time for the action – publishing our survey. Close the questionnaire and publish your survey from the survey listing page. Now your survey is ready to take responses. In the next section, we will learn about how to show the survey to your users.
Display Survey
As our survey is ready to take the responses, we now show the survey to the front-end users/guests. There are multiple ways a survey can be shown to the users.
- Shortcode – Get the shortcode that is displayed on the survey listing page in your survey row and add it to a WordPress page or post. The shortcode block in the gutenberg editor can be used to display the shortcodes.
- Menu item – NgSurvey comes with the menu item types to create a menu for your survey and survey category. Add the menu item to your main menu so that users can see it and access the survey.
- Campaigns – If you have installed Campaigns plugin, go to Campaigns by clicking the link in the survey row and start creating your first campaign. Please see documentation of Survey Campaigns plugin to learn more.
- Emails – If you have installed NgSurvey Emails plugin, you can configure the automated emails to send the survey invitations, for example when someone purchased a product on your WooCommerce shop or Easy Digital Downloads shop.
- Custom Invitations – Grab the survey URL by clicking on the View link on survey listing page and send it to your users manually.